Showing posts with label DIY Projects. Show all posts

Saturday, October 13, 2018

Birthday Basket Gift Idea for Candle, Soap, and Lotion Lovers

I recently celebrated my 49th birthday.  My daughters put together the nicest birthday basket for me.  I love candles, lotions, soaps, socks, and family photographs. My girls put together a super nice gift basket that contained a BUNCH of my favorite things.

Gift baskets make great gifts for birthdays and other special occasions.  You can buy gift baskets already made up at a florist or online or you can put one together yourself like this one.  I love the idea of personally putting a gift basket together.  You can create a gift basket built around any theme imaginable.  If your mom likes movies, create a movie basket.  If your dad enjoys sports,  create a sports themed basket.  If your son or daughter enjoys reading, create a basket filled with books from his or her favorite author.  Include bookmarks and perhaps a small lamp. 

I enjoyed seeing all the things my kids personally picked out just for me.

Birthday Basket Gift Idea
Image Credit:  Abundant Family Living

 Birthday Basket Gift Idea


They used a medium sized basket similar to these.  Then, they arranged 5 large Yankee Candles in Jars and one large WoodWick candle along with a few other items.  This is a great DIY gift basket idea for any woman for almost any occasion. In fact, here is a list of the things they placed in my basket.

Birthday Basket Gift Idea


Birthday Basket Gift Idea
Get this amazing crackling WoodWick candle here.
This is one of my favorite candles.  It crackles when it burns.  In the fall and winter months, it will be wonderful to crawl up on my couch with my favorite blanket and a good book.  It will be nice and cozy with this candle sitting close by.

They also included several Yankee Candles and other items similar to these:

Birthday Basket Gift Idea
Get it here!
Birthday Basket Gift Idea
Get it here!
Birthday Basket Gift Idea
Get it here!
Birthday Basket Gift Idea
Get it here!
Birthday Basket Gift Idea
Get it here!
Birthday Basket Gift Idea
Get it here!
Birthday Basket Gift Idea
Get it here!
Birthday Basket Gift Idea
Get them here!
They added ammo for my two pistols and a gift certificate for a family photo session with Carrie Jean Photography.

I couldn't be happier!  I loved my gift basket filled will all the goodies.  I hope this helps you with a gift basket idea for someone you love.

Read more posts about celebrations and gift giving here.

Monday, August 28, 2017

DIY China Cabinet Makeover


I’m not much of a DIY person and I’m certainly not a painter.  I’m a DIY WannaBe, but the reality is that I’m more of a poster child for Pinterest fail ads.  I’m impatient.  I like projects you can start and finish within a couple of hours.  Well, my daughter decided she wanted a china cabinet redone to go into her bedroom.  She wanted to display her vintage camera collection and some other treasures in it.  She needed a large cabinet but large curio cabinets are so expensive!  We opted to buy a china cabinet from a friend.  She recently sold her home.  She needed to sell it and we got a good deal on it.

DIY China Cabinet Makeover
Image Credit:  Abundant Family Living - Collage Created in Picmonkey.

DIY China Cabinet Makeover


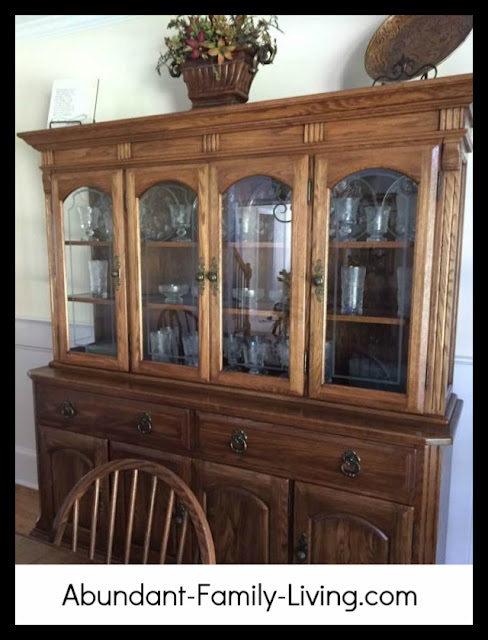
It started out as a stained oak china cabinet.  Here it is pictured in my friend’s home.

DIY China Cabinet Makeover
 
 I followed a few simple instructions to get the look I wanted.
  1. Take all the doors off the cabinet.
  2. Take all the hardware off.  Remove all the handles, hinges, and screws.
  3. Sand the cabinet.
If you want to try a project similar to this one, don’t let the sanding part wear you out.  You don’t need to go overboard with the sanding.  Just sand over it lightly once.  You don’t need to spend all day on this.

4.  Apply a layer of primer.

Most finished china cabinets like this one have a layer of varnish over the stain.  After sanding it, you’ll need to apply a layer of primer. 

5.  Apply two coats of paint.

Chalk paint is a popular option for a project like this one.  However, we had just added crown molding to my daughter’s room.  She loved the look and she wanted her cabinet to match her newly painted trim.  We had almost an entire gallon of interior white trim paint so we used it.  It is a semi-gloss paint.  It worked great and we love the finished product.

DIY China Cabinet Makeover
We were going to paint the inside but after we brought the cabinet home, we realized that the shelving is not removable.  You can’t see it in the picture, but there is glass on each side of the cabinet.  The wood shelving almost touches the glass.  There is no way I could paint the sides of the shelving.  We thought it would look odd to look inside the side of the cabinet to see white shelves without painting the sides white also.  It’s kind of hard to explain without showing you in person, but hopefully you’re understanding the dilemma.  We thought about painting the back inside of the cabinet gray or applying a wallpaper, but after finishing the outside, we decided we liked leaving the inside shelves to their natural charm.  We LOVE it.  My daughter has placed her treasures inside the cabinet and it looks amazing in her room.

PIN ME!
DIY China Cabinet Makeover

Saturday, November 21, 2015

Scrapbook from Manila File Folders

Shop Digital Downloads

Scrapbook from Manila File Folders
Image Credit:  Abundant Family Living

Every time I try to get into scrapbooking, I get discouraged. I’m not especially creative and making a memorable scrapbook can be time consuming.   I enjoy digital scrapbooking because there is no mess and I can do it all right on my laptop by placing photos into premade template pages.

However, I do get the occasional urge to make a few cutsy scrapbook pages and try again. My problem is patience. I don’t have any.

Recently, I learned that some people make mini scrapbook albums from envelopes, paper bags, and manila folders.

These albums can be made within a few hours and they make great gifts with or without added photos.

Here is how I made mine:

 Make a Scrapbook from Manila File Folders


First, I obtained four manila file folders. It doesn’t matter if there are marks or writing on it because any imperfections will be covered with decorative paper.

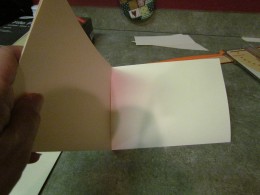
I cut the tabbed edges from the folder so that all the edges match up evenly. Then, I opened the folder up and folded it upward to make a horizontal crease which resulted in four sections with creases. With scissors, I cut the folder up along the vertical crease, but only halfway. This is so that the pages will open up correctly while viewing photos. After I cut the folder, I folded up the flaps and then folded the folder together to make the first pages of my undecorated book. I did the same thing with three other manila folders.

After all the folders were cut and folded, I used a hole puncher to punch holes in the binding and then stapled the folders (pages) together. I’m glad I punched the holes before I stapled the folders together. Otherwise, the book would have been too thick for my stapler.

Scrapbook from Manila File Folders

Scrapbook from Manila File Folders

Scrapbook from Manila File Folders

Then, I flipped through and decided what I wanted each page to look like. I cut and trimmed to make packets on some pages while other pages folded down.

Scrapbook from Manila File Folders

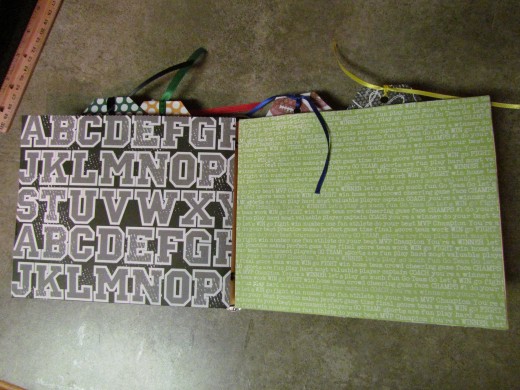
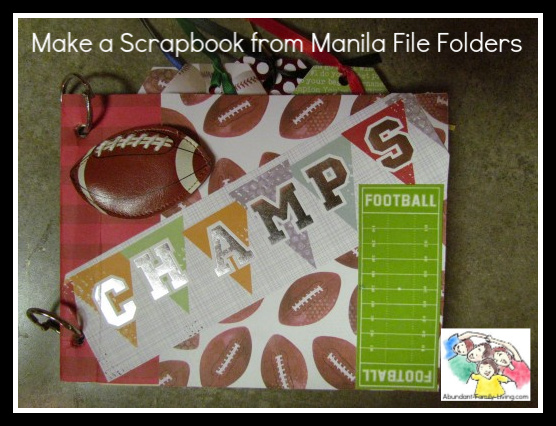
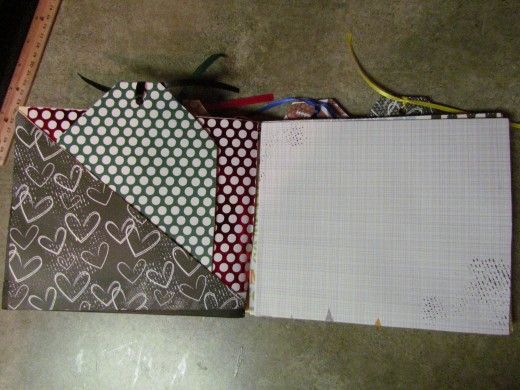
Then, I decorated each page with coordinating papers. This particular book features a sports theme. Inside the pockets of my book, I added tabs. They look like book marks. I added decorative paper to one side where small photos can be applied. On the other side, I pasted white paper for journaling. Photos can be arranged on the pocket and back page and on the tabs. While viewing the photos, the tabs can be pulled out so that the person viewing the photos can read about the event.

Finally, I added two rings on the binding and I attached ribbons to the tabs. My book was finished. I made this particular book as a gift for a friend. She will add her own photos later.

These books are adorable and can be made fairly quickly. They make cute gifts for birthdays, anniversaries, graduations, and even weddings. You can make one for vacation photos or you can make brag books for new parents and/or grandparents. The possibilities are limitless.

Helpful Hints:

Make sure you staple any pockets before adding decorative paper. Otherwise, the staples will show.

Use a quick drying glue. I used Modge Podge for decoupage because it last forever and dries quickly. However, this means you will have to place your decorative paper carefully and quickly. Once you place the paper, you won’t be able to remove it without tearing it off.

(Some people use glues sticks, but I don’t recommend it. Stick glue does not adhere well over time and you want this book to last.)

You can decorate the pages before stapling them together if you like. This way, you can get the decorative paper all the way into the inner binding. However, when I tried this with my second book, I ran into a few problems. I had forgotten to staple pockets together before attaching my paper. I also forgot to consider the binding when centering paper and placing journaling areas. I ended up having to trim part of a decorative frame off in order to make a page fold properly.

Don’t forget to cover the binding with paper for neatness.

Below are photos of my finished product.

Scrapbook from Manila File Folders

Scrapbook from Manila File Folders

Scrapbook from Manila File Folders

Scrapbook from Manila File Folders

Scrapbook from Manila File Folders

Scrapbook from Manila File Folders

Scrapbook from Manila File Folders

Scrapbook from Manila File Folders

Scrapbook from Manila File Folders

Scrapbook from Manila File Folders


You might also like:

Friday, July 17, 2015

This Chalkboard Plaque Makes a Great Photo Gift

This past Mother’s Day, I wanted to give my mother, my mother-in-law, and my step mother-in-law something personal. My daughters came up with a photo gift idea – a chalkboard plaque.
 
Chalkboard Plaque Makes a Great Photo Gift
Image Credit:  Abundant Family Living

 How to Make a Chalkboard Plaque

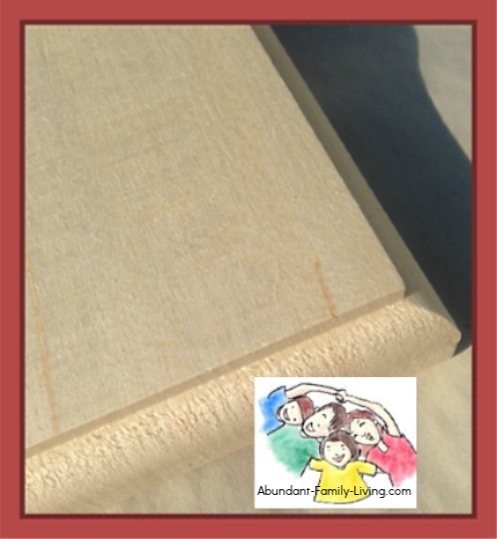
First we went to our local Michaels store and chose a smooth board with a nice edging.

Chalkboard Plaque Makes a Great Photo Gift
Image Credit:  Abundant Family Living

We sanded the wood a little bit although it didn’t need much.  Then we stained it.  We used Rust-Oleum Golden Oak Wood Stain.

Chalkboard Plaque Makes a Great Photo Gift
Image Credit:  Abundant Family Living

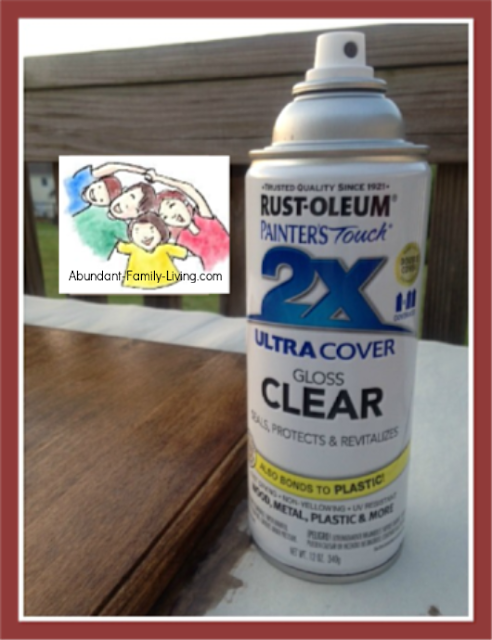
After the stain was completely dry, we used a finishing spray, a gloss sealant.  We chose Rust-Oleum Painter’s Touch.  The Watco Lacquer Finishing Spray is also a great choice.

Chalkboard Plaque Makes a Great Photo Gift
Image Credit:  Abundant Family Living

We found cute little chalkboards to glue onto the wooden plaque.  Our chalkboards measured approximately 5″ X 7.” If you are attempting this project, be sure to use an adhesive that adheres to all materials or choose a chalkboard with ribbon holes at the top.  We removed the ribbons from ours and used the ribbon holes to nail the chalkboards to the wood for extra stability.  We spotted little wooden “Family” embellishments to add to our photo gift idea.  The ones we chose were also made of wood and already painted white, but you can choose individual letters and paint them any desired color.

Chalkboard Plaque Makes a Great Photo Gift
Image Credit:  Abundant Family Living

We needed a way to display photos on our photo gift board, so we choose small metal paper clips.  We chose clips with holes so we could nail them onto the board for added durability.  We felt that glue alone would not hold the clips to the board after repeatedly opening and closing them to switch out photos over time.

Chalkboard Plaque Makes a Great Photo Gift
Image Credit:  Abundant Family Living

We were almost done but we needed to add a few final touches.  We wanted to attach a small metal bucket to the bottom of the plaque to store chalk.

Chalkboard Plaque Makes a Great Photo Gift
Image Credit:  Abundant Family Living

We decided that our honored mothers and grandmothers needed a way to hang their plaques so we added hanging brackets to the back.

Chalkboard Plaque Makes a Great Photo Gift
Image Credit:  Abundant Family Living
 
Now all we needed to do was add photos.  Our project was finished!

Chalkboard Plaque Makes a Great Photo Gift
Image Credit:  Abundant Family Living

We were finishing these up the night before Mother’s Day so we didn’t have time to order quality photographs.  I printed a few pictures using regular copy paper but if you are strapped for time like we were, you can print pictures from your own printer using photo paper.

Our projects turned out great!  We made three of these and each mother and grandmother loved them.  We made these for Mother’s Day but they would also make great DIY gifts for birthdays or “just because.”

You may also like:
Popular Posts

Have you ordered my book yet?

Have you ordered my book yet?
Start reading!

Verse of the Day from Bible Gateway