Pages

Tuesday, September 1, 2009

Resources for Classical Music Appreciation

Studies show that classical music education helps improve attention span and overall student achievement. You don’t have to be a musician to integrate classical music education into your curriculum. There are plenty of online resources to help you plan.  The following resources will help you integrate music education and classical music appreciation into your curriculum for your public school or home school classrooms.

The San Francisco Voice is a good place to start. The San Fransisco Voice offers readers the latest news regarding classical and other types of music. They offer tips and advice about music education, music teachers, and lessons. They also refer readers to other websites which aid in encouraging music education and appreciation.

Resources for Classical Music Appreciation
Image Credit:  Bulba 1 - CCO Public Domain Image - via Pixabay

September is Classical Music Appreciation Month

San Francisco Symphony Kids is an interactive webpage which educates children about the instruments of the orchestra. Kids click on an instrument family to learn all about the instruments. The webpage also includes a music lab and updates on concerts and events suitable for children.

Broadway Musical Home provides information about Broadway musicals and theaters. The site keeps readers updated on currently playing musicals. Students who access the site can learn about the longest running musicals in Broadway history. They can also learn about the most popular musicals and Tony Award winners. Teachers can develop detailed lessons around such topics or simply allow students to access and explore the site on their own.

CarnegieHall.Org provides teachers and parents with games, listening guides, and more. Teachers, parents, and students can click on the following topics for resources: For K-12 Educators, Games and Listening Guides, Master Classes, For Teaching Artists, Performances, and Artists Interviews.

Classical Chops offers video interviews with famous musicians and composers. Students will enjoy an interactive page where they create their own classical music masterpiece. The Soundtrack Swap feature allows students to hear how music affects perception of video. By accessing the “Getting Started” tab, students can learn more about how to get into the music business. They can follow links to learn orchestration, learn how to write a song, learn about music notation software. Other links include: Music Career Ideas, Learn Key Signatures, Free Sheet Music, Free Printable Staff Paper, Ear Training, Music Theory, Classical Music Research and Appreciation, Find a Music Teacher, Performing Arts Schools in Los Angeles, Performing Arts Schools in Orange County, Music Scholarships, Making Music, Film Composing, Videos on Film Composing, Books on Film Composing, Education Programs on Film Composing.

Students can also upload their own classic music video on Classic Chops.

 
Classics for Kids allows kids to learn about Composers by topics such as “Composers by Musical Period” and “Composers by Timeline.” Students will access a Composer Map where they can click on a particular country and learn about the composers who lived there. Kids can also enter a Composer Time Machine and compose their own music. Students can listen to music, learn about music careers, and even make their own radio show. This site is attractively designed for kids and offers resources for adults such as lesson plans; activity sheets; and tips and advice. Adults can access a tab for “Parents” and a tab for “Teachers.”

The Dallas Symphony Orchestra Kids allows kids to click on a Composer’s name and listen to his or her music. Composers are listed by the periods Renaissance, Baroque, Classical, Romantic, and Modern. This site offers games such as Beethoven’s Baseball and Music Match. Children can access kid friendly music theory lesson and take advantage of great music practice tips. Kids learn by building Xylophones, making woodwind and stringed instruments, making chimes, and creating drums. Families will find a list of family friendly concerts and children can join a Dallas Symphony Orchestra Kids Club where they will receive periodic emails which include music puzzles and event information.

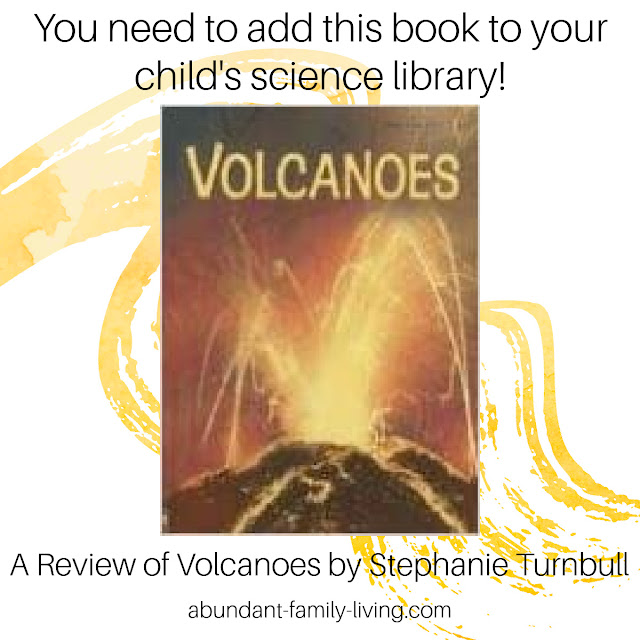
Music and reading are two of the best educational activities you can offer your child. Here is a great educational book about Volcanoes. Your child will love it especially if your child enjoys science.

Wednesday, July 1, 2009

Chicken Enchiladas Recipe

My husband and I have both endured a few minor “heart hiccups” lately. Thankfully, neither of us were diagnosed with anything serious and my husband’s “hiccup” was actually corrected. Other than the fact that we both need to drop some weight, our hearts are pretty healthy for now. We want to keep it that way so this week, I decided to try out a few heart-healthy recipes. Last night, we enjoyed Kid-Friendly Chicken Enchiladas with Black Beans and Corn. The original recipe is approved by the American Heart Association. I made a few changes due to availability of some of the ingredients, but for the most part, this recipe for chicken enchiladas is the same.

Chicken Enchiladas Recipe
Image Credit:  Abundant Family Living (formerly Mom Is Forever)

Chicken Enchiladas


You will need:
1 lb. chicken breasts, sauteed and cooled
15.5 oz canned, low sodium black beans
10 oz package frozen whole kernel corn
15 1/4 oz canned, no salt added OR low sodium corn
3 tsp salt-free mild chili powder
12 taco sized whole wheat or corn tortillas
12 toothpicks
14.5 oz canned, no salt added OR low sodium tomato paste
1/2 cup fat-free sour cream

Here is how I made our dinner:
  1.  Preheat the oven to 400 degrees.
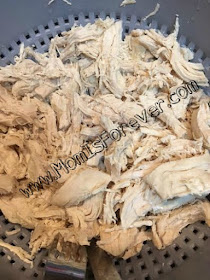
  2. The original recipe calls for sautéed chicken.  I boiled our chicken instead and then shredded it.
Chicken Enchiladas Recipe

 3. To the shredded chicken, add black beans.

Chicken Enchiladas Recipe
Chicken Enchiladas Ingredients

4.  Then, add corn.

Tip:  I drained our corn, but after completing the meal, I wish I hadn’t.  The chicken was good but I would have liked the filling a little more moist.  The next time I make this, I’m not going to drain the corn.  I think this will leave the filling less dry.

Chicken Enchiladas Recipe
Chicken Enchiladas Ingredients

5.  Add one teaspoon of chili powder.

Chicken Enchiladas Recipe
Chicken Enchiladas Ingredients

6.  Mix it all together.  This makes the enchilada filling.

Chicken Enchiladas Recipe
Chicken Enchiladas Ingredients

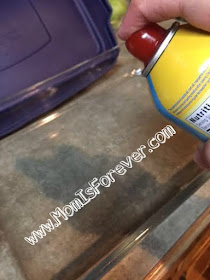
7.  Spray a baking dish with Pam.  I used a clear, glass dish.
Chicken Enchiladas Recipe
Chicken Enchiladas Instructions

 8.  Spoon out a desired amount of filling onto a soft tortilla.

Chicken Enchiladas Recipe
Chicken Enchiladas Instructions

9.  Roll up the tortilla.  Hold it in place with a toothpick.

Chicken Enchiladas Recipe
Chicken Enchiladas Instructions

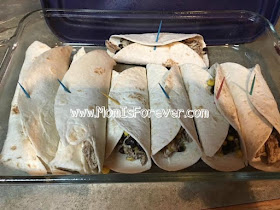
10.  Place the desired amount of tortillas into the baking dish.
Chicken Enchiladas Recipe
Chicken Enchiladas Instructions

11.  Spoon out any left over filling onto the tops of the tortillas.

After I did this, I removed the toothpicks.

Chicken Enchiladas Recipe
Chicken Enchiladas Instructions


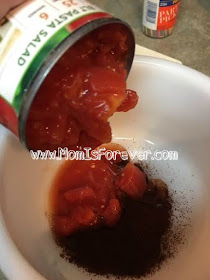
12.  In a separate bowl, pour in 2 teaspoons of chili powder.

Chicken Enchiladas Recipe
Chicken Enchiladas Instructions


13.  Add tomato paste.

I opted for diced tomatoes instead.  After completing the meal, I realized that a can or two of Rotel would have been a good choice as well.
Chicken Enchiladas Recipe
Chicken Enchiladas Instructions

14.  Add sour cream.

Chicken Enchiladas Recipe
Chicken Enchiladas Instructions

 15.  Mix it all up.

Chicken Enchiladas Recipe
Chicken Enchiladas Instructions

16.  Pour the mixture over the tortillas.

Chicken Enchiladas Recipe
Chicken Enchiladas Instructions

17.  Bake at 400 degrees until warm.  I baked our enchiladas for 20 minutes.

Chicken Enchiladas Recipe
Chicken Enchiladas Instructions

With the exception of one daughter who hates anything with corn in it, this was a success.  We will definitely have it again.  My husband carried some to work the next day for lunch.  He said it was good reheated too.

Tonight, we enjoyed homemade beef stew which will hopefully be the subject of my next recipe post.  Come back soon for that one!


Need a desert idea? Try this chocolate cobbler. It won't disappoint! 

Chocolate Cobbler Recipe

Friday, May 1, 2009

Georgia's 7 Natural Wonders

You’ve probably heard plenty about the 7 natural wonders of the world, but my home state of Georgia has its own 7 natural wonders.  I was born and raised in the state of Georgia.  I raised my children in the state of Georgia and I look forward to watching my future grandchildren grow up in the state of Georgia.  I have loved living here.  It truly is a beautiful state and a great place to raise a family.  Georgia is filled with places to go, things to do, and beautiful things to see.  Here are Georgia's 7 natural wonders.

Georgia's 7 Natural Wonders


Georgia's 7 Natural Wonders


Stone Mountain:  Stone Mountain is probably the most popular of Georgia’s 7 natural wonders.  Stone Mountain is the largest most exposed mass of granite in the world.  About 4 million people visit the mountain every year.  Visitors to Stone Mountain park enjoy a variety of attractions including the confederate memorial carving, a summit skyride, a nightly laser show, campgrounds, golf, and so much more.  For a complete guide to Stone Mountain and to plan your trip, visit the Stone Mountain Park website here.

Warm Springs:  The town of Warm Springs, Georgia is home to Georgia’s natural warm springs.  The water flows down Pine Mountain from nearly 90 degree springs. President Franklin D. Roosevelt visited the springs to treat his paralysis due to Polio.  In fact, he had a home in Warm Springs called The Little White House.  For more information about Georgia’s Warm Springs, visit the Warm Springs website here.

Amicalola FallsAmicalola Falls is absolutely beautiful.  Visitors  enjoy a mountain top lodge, hiking trails including part of the Appalachian Trail, and they will visit the tallest cascading water fall in the southeast.  To learn more about Amicalola Falls, visit the Georgia State Parks website here.

Tallulah Gorge:  I recently hiked Tallulah Gorge.  It wasn’t easy but it was worth it.  The Tallulah Gorge canyon is 2 miles long and 1000 feet deep.  Visitors can hike trails, view overlooks, and more.  Visit the Georgia State Parks website here to learn more about Tallulah Gorge.

Radium SpringsRadium Springs is Georgia’s largest natural spring located on the east side of the Flint River in Albany.  The spring pours out 70,000 gallons of fresh water per minute.  The spot was best known for swimming and fishing until the 20th century discovery that the springs contained traces of radium.  In addition to the springs glowing blue color, visitors also enjoy cottages, riding and walking trails, and golf courses.  To learn more about Radium Springs, visit the Radium Springs Gardens site here.

The Okefenokee Swamp:  The Okefenokee Swamp is one of the “largest natural, unspoiled freshwater and black water wilderness swamps in North America.” (Okefenokee.com)  It covers about 7oo square miles.  The word “Okefenokee” means “land of trembling Earth” in the Creek Indian language.  The swamp offers paddle and motor boat trails, cabins, camping, and guided tours.  To learn more about The Okefenokee Swamp, visit the Okefenokee Swamp website here.

Providence CanyonProvidence Canyon is also known as Georgia’s “Little Grand Canyon.”  Poor farming practices in the 1800s resulted in massive gullies as deep as 150 feet.  Visitors enjoy beautiful views in unique natural colors, hiking trails, and cottages.  For more information about Providence Canyon, visit the Georgia State Parks website here.
Read about more great places to visit in the state of Georgia here.

Georgia's 7 Natural Wonders

Wednesday, April 1, 2009

Bacon Ranch Pork Chops in Gravy Sauce

I don't usually like pork chops, but after testing this recipe, I'll be making them a lot more. This  recipe for bacon ranch pork chops in gravy sauce turned out much better than I expected.  I wanted to make a lot so that I would have enough left over to put in the freezer for another day.  This time, I baked the pork chops in the oven but I think I'll adjust the recipe a little bit and try it in my slow cooker next.  I'll let you know how that turns out. 

Bacon Ranch Porkchops in Gravy Sauce
Image Credit:  Abundant Family Living

Bacon Ranch Pork Chops in Gravy Sauce

 
These are the ingredients I used:

12 Thinly Sliced Boneless Pork Chops
2 Tablespoons Soy Sauce
1 Tablespoon Apple Cider Vinegar
1/4 Cup Bacon Bits (You can use about 8 strips of real bacon, but I didn't have any today.)
1 Beef Bouillon Cube
1 Cup Boiling Water
1 Tablespoon Onion Powder (You can chop up one real onion, but again, I didn't have one tonight.)
3 Tablespoons Garlic Powder (You can use 2 minced cloves of garlic if you wish.)
1 Tablespoon Thyme
2 Tablespoons Light Brown Sugar
2 Tablespoons Corn Starch
1/4 Cup Ranch Salad Dressing

Directions:

Spray a 9 X 13  baking dish with Pam Cooking Spray.  Then, set it aside.

Preheat the oven to 350 degrees. 

In a large mixing bowl, mix together the soy sauce, apple cider vinegar, onion powder, garlic powder, thyme, brown sugar, and salad dressing.  Blend together with a whisk or fork.

Boil one cup of water.  Dissolve the beef bouillon cube in the boiling water.  Now you have beef broth.  Allow the broth to cool.  Then, pour it in the mixture above.

Add the corn starch.  The gravy sauce will thicken up.

Add the pork chops and bacon bits into the mixture.  Mix it all up well.

Place the coated pork chops in the 9 X 13 baking dish.  Pour the excess gravy sauce mixture over the pork chops.

Bacon Ranch Porkchops in Gravy Sauce


Bake at 350 degrees until the pork chops are cooked to your taste.  It doesn't take long to cook the thinly sliced boneless ones that I used.  I baked mine for about 20 minutes.

Enjoy!

Bacon Ranch Porkchops in Gravy Sauce

You might also like this chicken enchilada recipe.


Need a dessert idea? Try this chocolate cobbler. It won't disappoint!

Chocolate Cobbler Recipe

Sunday, March 1, 2009

Coffee Filter Flower Planter

 Coffee Filter Flower Planter Craft for Kids

Finally, it's March 1st!  We have spent months doing fall and winter crafts and activities.  Here in Georgia, we get to enjoy all four seasons.  Sometimes we get to experience all four seasons in one day!  I'm not particularly fond of winter, but I still enjoy the season due to celebrating Thanksgiving, Christmas, Valentine's Day, and all the fun that goes along with those holidays.  Then, by the time March rolls around, I'm ready for Spring.  After a long winter nap, the world wakes up again.  Trees start budding and flowers start growing.  One of my favorite first signs of spring is seeing the yellow daffodils bloom.  Shortly after they bloom, the leaves start growing on the trees and the next thing I know, other flowers are blooming and the environment around me is colorful again.  This is a great time for kids to make a coffee filter flower planter craft. 

Spring Flower Craft
Coffee Filter Flower Planter

I love doing spring crafts and activities with my preschoolers.  This planter is made from paper plates, tissue paper, and paints or crayons. 

Spring Flower Craft

We started out with two paper plates.  You don't necessarily need the thicker, sturdier ones.  We used the cheapest ones I could find.

Spring Flower Craft

 I cut one paper plate in half.  Then my preschooler painted the front side of the whole plate.

Spring Flower Craft

When he was finished with the whole plate, he painted the back side of the half plate.

Spring Flower Craft

We used coffee filters for the flowers.  I asked my little guy to paint each coffee filter a different color.  We used water-color paints.  Water-color paints are great for this activity because the colors bleed easily through the filters. 

Spring Flower Craft

The plates and filters will need to dry.  Here are our finished plates and colorful springtime flowers.

Spring Flower Craft

After the coffee filter flowers have dried, grab the center with one hand and use your other hand to fold them up like the photo above.

Spring Flower Craft

You can opt to glue the flowers to the inside of the paper plate, but we decided to use tape.  The tape actually holds the flowers on better and there is no waiting for the glue to dry.  We taped the bottom of the flowers to the center area of the plate.

Spring Flower Craft

Then, we stapled the half plate onto the whole plate like the photo above to create the planter.

Spring Flower Craft

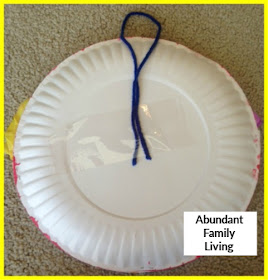
We added a yarn hook to the back.  Again, we just used tape.

Spring Flower Craft

We finished with a pretty springtime wall planter filled with pretty spring flowers!

This flower craft is good for any time during the spring or summer, but it is especially nice in May for a Mother's Day gift.

Sunday, February 1, 2009

Volcanoes by Stephanie Turnbull (Includes a Free Printable)


Volcanoes by Stephanie Turnbull

Are your children interested in volcanoes?  As soon as I signed on with Usborne Books, my sponsor sent me a nice surprise.  Within a couple of days, Volcanoes by Stephanie Turnbull arrived in the mail.  We have a couple of plastic volcanic structures in our toy bin so my preschoolers were excited about reading the book.

 Volcanoes by Stephanie Turnbull


Volcanoes by Stephanie Turnbull is written for beginning readers ages 6 - 8, but I read it to my preschoolers and they loved it.  They were curious about the Earth's three layers.  They were interested in how eruptions happen.  They were fascinated by the illustrations of hot lava.  The pictures kept them interested in the content even though it was written for older children.  The children learned about underwater volcanoes.  They learned that Hawaii was formed by underwater volcanoes.  Within the 32 pages of this book, kids learn about volcanologists, real volcanoes that have erupted in the United States, and the city of Pompeii.

The book includes a short glossary of vocabulary words.

Volcanoes by Stephanie Turnbull
Pin Me!
Volcanoes is a great book which is short enough to keep the attention of preschoolers through age eight, yet long enough to include a wealth of information for young learners.  We loved it and I'm sure you and your kids will enjoy too.


Volcanoes by Stephanie Turnbull (Includes a Free Printable)
Volcanoes by Stephanie Turnbull

Since my little audience is so young, I took the opportunity to create few short early learning activities to go along with the book and I'll share them with you for FREE! I made upper case letter cards for letter recognition. It is best to print this out on cardstock so the cards last longer. Kids will complete a few simple patterns, count and write numbers, arrange from smallest to largest (or largest to smallest), color a volcano, and you can use two sets of vocabulary flashcards if you have a few older kids who are learning to read.

Thursday, January 1, 2009

Chocolate Cobbler Recipe

How to Make a Chocolate Cobbler


I rarely think about my grandmother without thinking about the foods she cooked. She had 6 living children and 15 grandchildren, yet she knew everyone's favorite foods. Savory, sweet, or both, my grandmother remembered our favorites. If she knew I was coming to visit, she would have her wet coconut cake already made and then we would make her chocolate oatmeal no-bake cookies together. For my dad, she would make a German chocolate cake. For other family members, she would make cracklin' cornbread, homegrown green beans, and any other combinations of everyone's favorites. If we were all coming, she would have it all. Growing up in the southern United States definitely had its advantages and one of those advantages is southern cooking made straight from the hearts of our grandmothers. From corn on the cob to cobblers, we love it all.

Speaking of cobblers, I'm sure you're familiar with Peach Cobbler and Apple Cobbler, but did you know there is also a Chocolate Cobbler? I had never heard of a chocolate cobbler until recently. Someone brought one to a family gathering. It looked way too good to pass up (like I would ever pass up chocolate). I was determined to learn how to make one but I wondered how the center stays pudding-like while the outside bakes like a cake. I'm really not that much of a cook so I wasn't sure I could pull it off. Well I did and it was amazing.

This recipe is easy to follow. You'll be enjoying your own homemade Chocolate Cobbler in no time at all.

Chocolate Cobbler Recipe
Chocolate Cobbler

Chocolate Cobbler Recipe


Are you a chocolate lover? If so, you're in the right place! I am thrilled to share with you an incredible dessert that is sure to satisfy your sweet tooth. It's a Chocolate Cobbler that is not only delicious but also easy to make. This recipe is perfect for those who want to treat themselves to a decadent dessert without spending hours in the kitchen. So, without further ado, let's dive into this scrumptious recipe.

The first step in making any recipe is gathering all the necessary ingredients. Here's what you'll need for this delightful treat:

6 Tablespoons Butter
1 Cup Self Rising Flour
3/4 Cup White Sugar
1 and 1/2 Tablespoons Unsweetened Cocoa Powder
1/2 Cup Milk
1 Teaspoon Vanilla Extract (Flavoring)
1 Cup White Sugar
1/4 Cup Unsweetened Cocoa Powder
1 and 1/2 Cups Boiling Water

Preparation:

Now that we have all the ingredients, let's get started with the preparation!

Preheat your oven to 350 degrees F (175 degrees C). This is an essential step in baking as it ensures that your dessert cooks evenly. While the oven is preheating, take an 8x8 baking dish and melt 6 tablespoons of butter in it. You can do this by placing the butter into the baking dish and placing it inside the oven. Be sure to keep an eye on it to prevent the butter from burning.

Once your butter is melted and your oven is preheated, it's time to mix your dry ingredients. In a separate bowl, stir together 1 cup of self-rising flour, 3/4 cup of sugar, and 1 1/2 tablespoons of unsweetened cocoa powder. This mixture is the base of your chocolate cobbler and will give it its rich, chocolaty flavor.

Next, stir in 1/2 cup of milk and 1 teaspoon of vanilla extract. The milk will help to moisten the flour and sugar, while the vanilla extract will add a hint of flavor that complements the chocolate perfectly. Stir these ingredients until they are well combined.

Chocolate Cobbler Recipe
Chocolate Cobbler Batter

Spoon the batter over the melted butter in the baking dish.  Then, stir together 1 cup of white sugar and 1/4 cup of unsweetened cocoa powder.  Sprinkle the mixture over the batter.

Chocolate Cobbler Recipe
Chocolate Cobbler

Boil 1 1/2 cups of water and then pour it over the top of the mixture.

Chocolate Cobbler Recipe
Chocolate Cobbler:  Pour the boiling water carefully!

Bake for 30 minutes or until it appears set.  Serve warm with ice cream.

Well . . . we were out of ice cream, but it didn't matter.  This turned out so well!  It requires typical ingredients that most people have around the kitchen all the time and it doesn't take long to prepare.  You can whip it together almost anytime without having to run to the grocery store for that one odd ingredient that you never have around.

This is what it looked like after I pulled it out of my oven.  You can smell the chocolate, can't you?

Chocolate Cobbler Recipe
Delicious Chocolate Cobbler

And there you have it! A simple, yet delicious Chocolate Cobbler recipe that is sure to satisfy your chocolate cravings. This dessert is perfect for a family gathering, a potluck, or just a night in by yourself. So, why wait? Get your mixing bowls and baking dish ready and start making this delightful treat today!

PIN ME!
Chocolate Cobbler Recipe